Start with the result
This workflow turns a marked-up city photo into an FPV drone-style shot. The red route is only a camera guide; the final video should be clean, cinematic, and free of path marks.
Drone_flight.mp4, generated from the marked Tokyo route image.Workflow overview
The idea is simple: you use an image as a map, draw the exact camera route on it, then tell Google Flow that the marks are movement references only.
- Start with a clean reference photo.
- Draw a visible red route with arrows and node order.
- Upload the marked image into Google Flow.
- Use Flow Agent / Agent Mode so the model treats the image like a plan.
- Paste a prompt that separates guide marks from final visuals.
- Generate the FPV shot and check whether it follows Node 1, Node 2, and Node 3.
Step 1: Prepare the reference photo
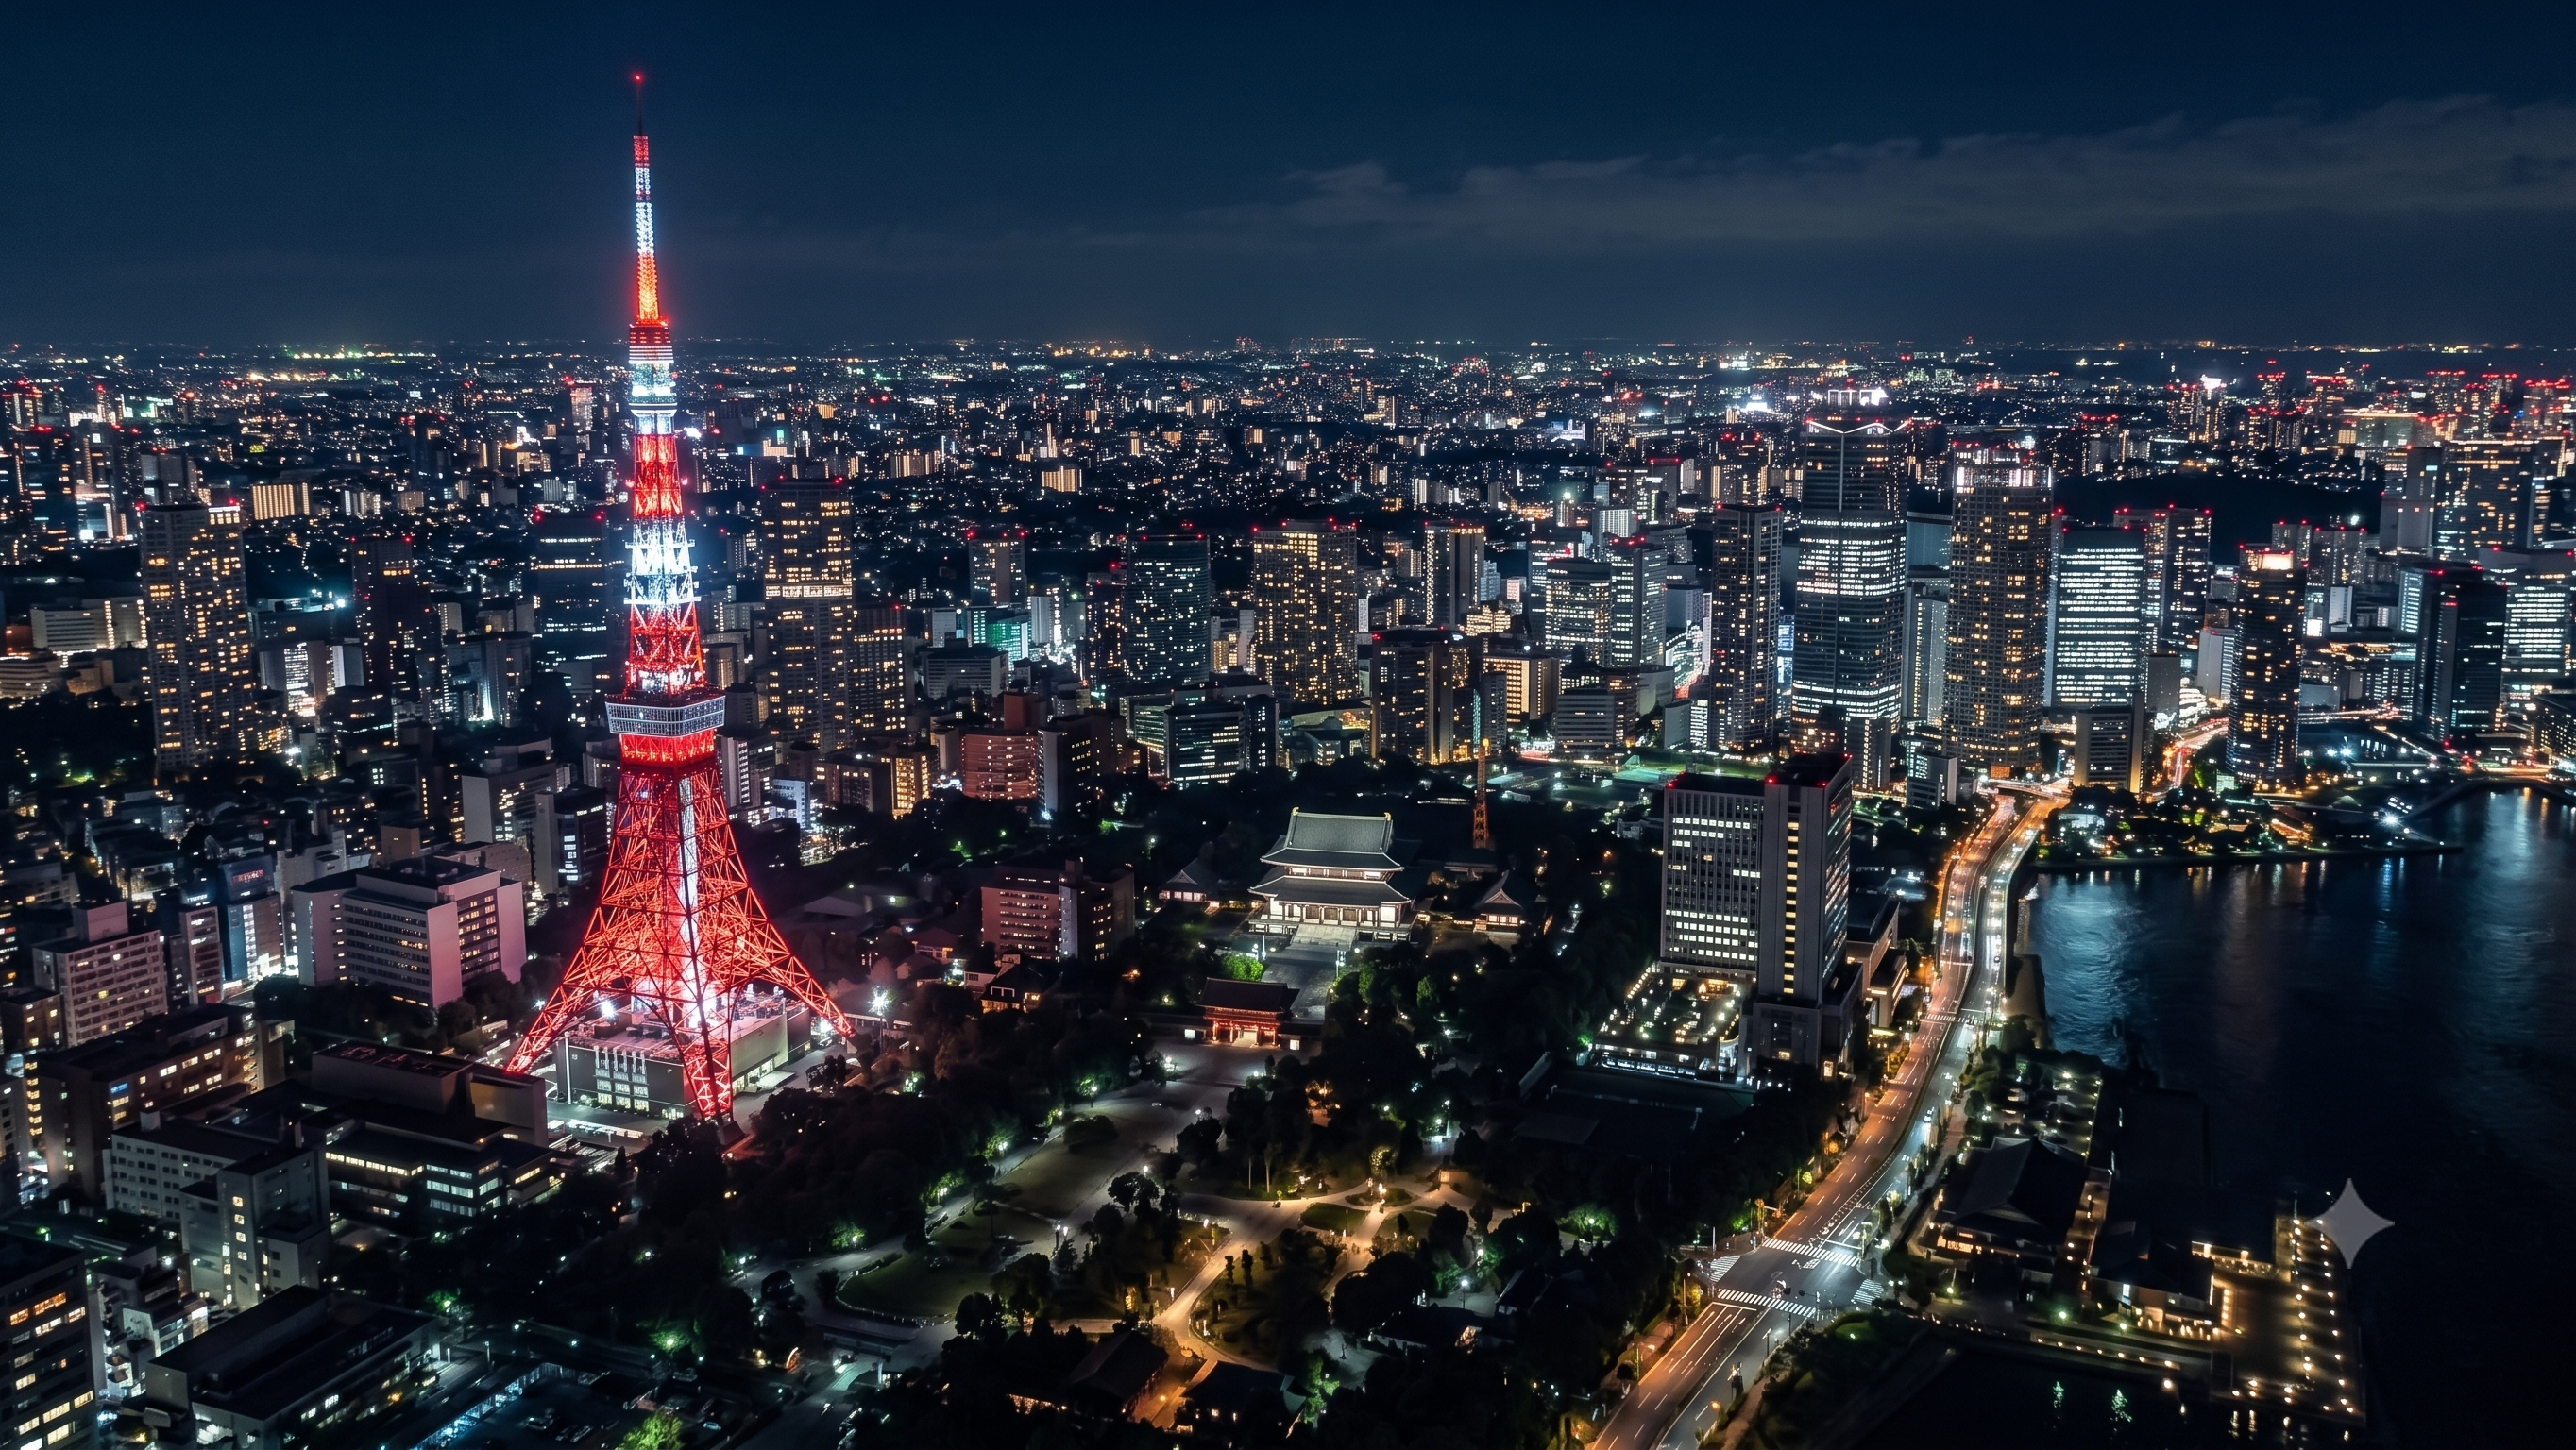
Start from a clean image with no route marks. In this example, the base image is tokyo_raw.png.
Choose a photo with strong architecture, clear depth, and visible lanes or gaps the camera can pass through. A dense night city works well because the light trails make the speed feel stronger.
tokyo_raw.png: the clean reference image before drawing the camera path.Step 2: Draw the flight path
Draw the route directly on top of the reference photo. Use a high-contrast color like red, add arrows, and label the path order with nodes.
The route image for this guide is tokyo.png: it shows the intended direction from Node 1 to Node 2 to Node 3.
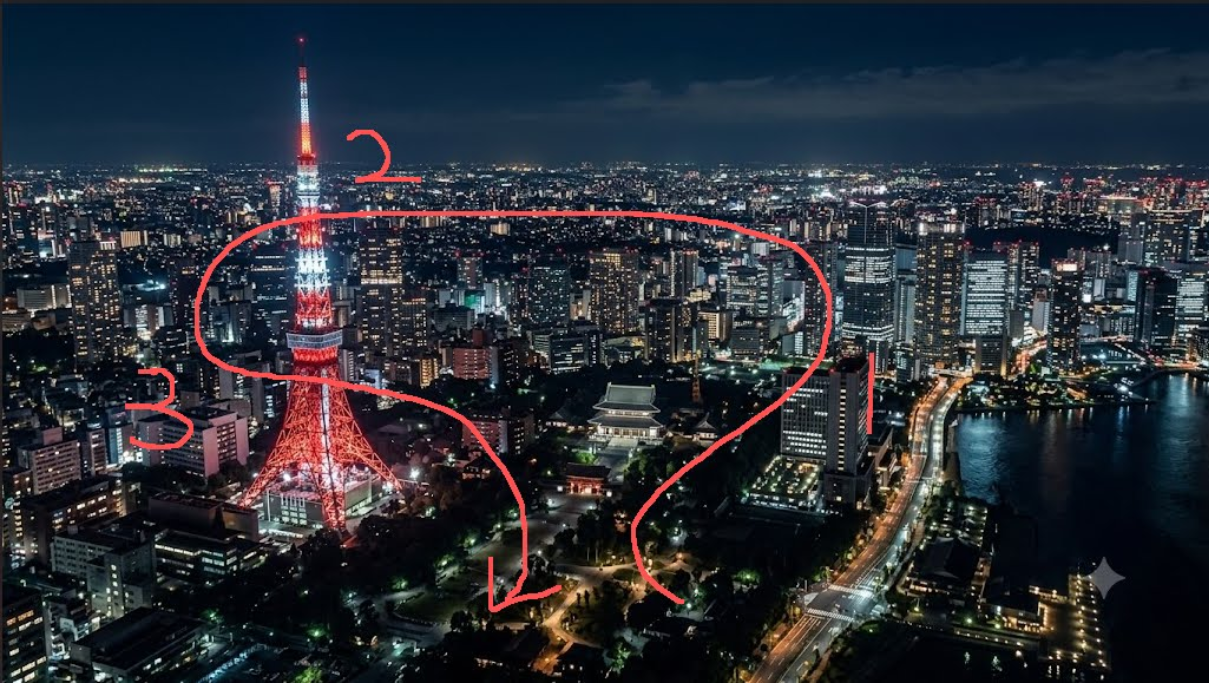
tokyo.png: the red path is a camera movement guide only. It should not appear in the final video.- Use a color that is easy for the model to recognize.
- Make the path continuous instead of broken into unclear segments.
- Use arrows to show direction.
- Use node labels when the route has multiple turns.
- Keep the route simple enough for one continuous shot.
Step 3: Use Flow Agent Mode
Open Google Flow, upload the route image, then use Flow Agent / Agent Mode. The goal is to make Flow treat the marked photo as a camera plan instead of just a visual reference.
The operation flow below shows the setup process inside Google Flow.
flow.gif; this page uses a lighter MP4 version for faster loading.- Upload the marked
tokyo.pngimage as the reference. - Use Agent Mode so the model follows instructions from the image and prompt together.
- Keep the prompt focused on camera movement, trajectory, and negative constraints.
- Do not rely on the image alone. The prompt must explicitly say the red marks are not part of the final video.
Step 4: Paste the prompt
Paste this prompt after uploading the marked route image. Keep the section labels because they make the instruction easier for the agent to parse.
[Constraints]
Remove the red lines from the image. The red lines and arrows are only for camera movement reference; no red lines, arrows, or markers should appear in the final video.

[Camera Movement]
First-person FPV perspective, ultra-high-speed camera movement, cinematic, one-take / continuous shot. The camera must strictly follow the red path shown in the image without deviating, skipping, or simplifying the route. The architectural structures passed through must be clear, with realistic silhouettes and strong texture details.

[Trajectory]
The camera starts flying continuously through Node 1, Node 2, and Node 3 in sequential order, strictly following the direction of the arrows.

[Texture & Quality]
The visuals must be realistic, with smooth and stable motion, a strong sense of speed, and clear spatial continuity. No repeating buildings, no distortion, no text, and no watermarks.
The most important line is the first constraint. Without it, the model may treat the red path as something visible in the scene instead of a hidden camera guide.
Step 5: Check the output
After generation, you should get a complete FPV flight video like Drone_flight.mp4.
Check the output with three questions:
- Did the final video remove every red line, arrow, marker, and node label?
- Does the camera clearly fly through Node 1, Node 2, and Node 3 in order?
- Does the movement feel like one continuous FPV shot instead of several unrelated clips?
If all three are true, the route control worked.
Fix common problems
- Red marks appear in the final video: strengthen the first constraint and say
no red lines, no arrows, no labels, no markers. - The camera ignores the route: simplify the path, make the arrows larger, and use clearer node labels.
- The video jumps between shots: emphasize
one-take / continuous shotandclear spatial continuity. - Buildings repeat or distort: keep
no repeating buildingsandno distortionin the quality section. - The movement is too slow: use
ultra-high-speed camera movementandstrong sense of speed.